western lowland gorilla
step by step article
Painting in miniature is an intensely personal experience; the challenge of conveying your idea in such a small space, combined with the level of concentration required to execute it, can be daunting but it is also hugely enjoyable, as you become completely absorbed in the tiny world you are creating - in the same way that the intimate nature of miniature art later draws the viewer in.
It's always good when painting wildlife to spend as long as you can simply watching your subject, whether it is a bird in your garden or more exotic creatures on holiday or visiting a wildlife park. While it's true that there is no substitute for being able to observe animals in their natural habitat, this isn't always possible for artists; zoos and parks offer a very good alternative combined with finding out as much as you can about their behaviour and environment in the wild.
Sketching, making notes and taking photographs are all useful tools and a combination of all three will help you remember what inspired you when you begin to work on the final painting back at home.
MATERIALS:
Surface - HP watercolour board or paper.
Pencil - HB sharpened to a fine point.
Paints - I used Winsor & Newton Artists Watercolours: Payne's Grey, French Ultramarine, Burnt Sienna, Yellow Ochre, Titanium White.
Brushes - Kolinsky Sable (short handled) in 3, 1, and 10/0.
Misc - kitchen roll, magnifying glass.
tips
- Watercolour paper can be easily damaged at the drawing-out stage by excessive erasing or pressing too hard which can spoil the results when you come to apply paint. If you are worried about damaging the surface, do your initial drawing on a separate sheet of paper and then trace it over when you are happy.
- Check the proportions carefully before you start to paint - hold your work up to a mirror to see any mistakes more clearly. This is helpful as the work progresses as well.
- Avoid textured surfaces for a miniature painting. Whatever you use, it needs to be completely smooth.
- Use a little less water as you add more detail. Aim for something like double cream.
- Choose brushes that hold a good amount of paint and keep a very fine point.

Using a sharp pencil mark out a rectangle of 3.25" x 2.25" on the watercolour board.
Lightly draw in the outline and main features taking care not to press too hard and gently erasing any mistakes until you are happy with the drawing.
(I have made these lines darker than usual so they will show up). These pencil lines are only intended to act as a guide when you start to apply paint.

Loosely block in the background using a no.3 brush and a mixture of burnt sienna with a dash of french ultramarine.
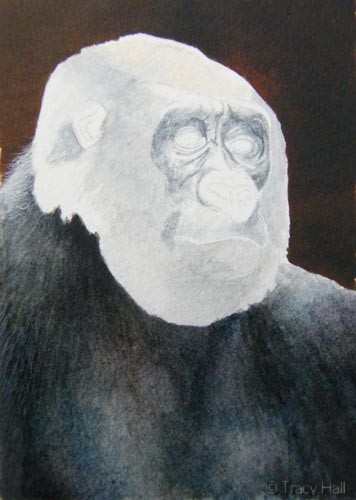
With the same brush block in the main body and face with a thin wash of paynes grey, taking care to leave the area around the nose and eyes untouched.
Using the same mixture, begin to define the features of the face, avoiding going too dark yet. It is more effective to build up the tones gradually with lots of layers.
Using a mixture of french ultramarine and burnt sienna begin to define the contours of the body with a no. 3 brush.

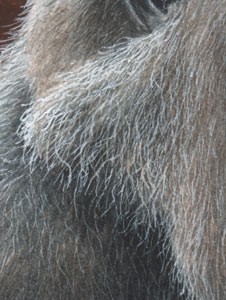
Switch to a no 10/0 brush and start to add the hair on the body by short strokes in the direction of the hair growth. Vary the length of the hairs and don't press hard; try to do a little flick with your wrist. Add a little titanium white to the mixture to make it opaque and add more hairs over the top.
Let this dry, then using a no.3 brush lay a glaze of french ultramarine and burnt sienna over the hairs you have done. Work quickly and lightly to avoid smearing the opaque paint.
Let this dry then repeat the process as many times as you like to give the effect of depth and thick, coarse hair. Using a no.3 brush mix up a little yellow ochre and burnt sienna and add a thin wash over the cheeks and the top of the head.
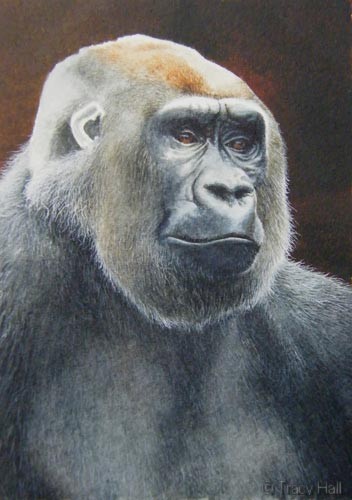
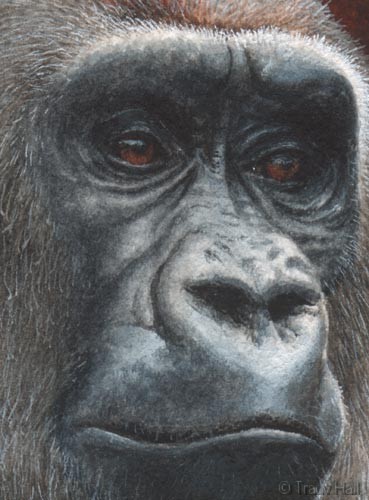
Using a no.1 brush and paynes grey with a little burnt sienna begin to define and mould the face, working carefully and slowly over small areas at a time and blending in hard edges as you work to leave the very lightest areas untouched.
By this stage I am using a hand held magnifying glass to help see the finest detail. Using burnt sienna and french ultramarine outline the eyes with a no 1 brush and burnt sienna with a touch of yellow ochre for the eye itself. While this is still damp, add the pupil using burnt sienna and french ultramarine.
When this is dry, mix up some titanium white with a touch of french ultramarine and carefully add the highlight.
Continue to add the hairs around the face and head and paint in the ear using paynes grey with a little burnt sienna. At this stage make up a thin wash of burnt sienna and glaze over the whole body and head, avoiding the face, and then add a final layer of hair all over, finishing with a very light mix of mainly titanium white for the final few hairs. Don't overdo it or you will lose all the layers you have so carefully built up underneath.
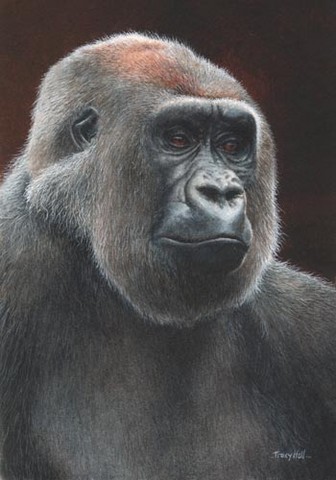
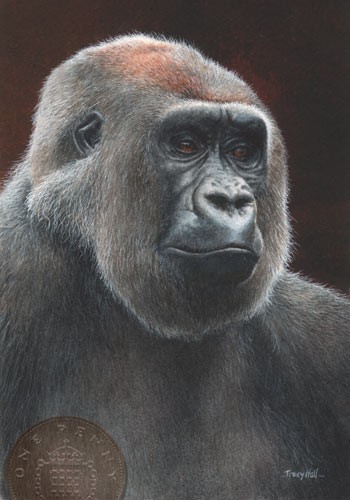
The final stage is to finish adding the details to the face and darken the areas around the eyes which are in shadow.
The finished painting measures 3.25" x 2.25" and is shown here with a penny for scale.
This miniature painting came about after a visit to London zoo. I wanted to keep it very simple for impact and used several photographs for reference, taking little details from each one and completely ignoring the cluttered backgrounds.
Short listed for the David Shepherd Wildlife Foundation ‘Wildlife Artist of the Year’ exhibition at the Mall Galleries, London, in the summer of 2010 where it received a Highly Commended award and sold, with half the proceeds going directly to help fund the many conservation projects supported by the DSWF around the world.
(This article originally appeared in Leisure Painter Magazine © Tracy Hall 2013 )